RichFlyer SDKのインストール
RichFlyer SDKのインストールは、CocoaPodsを利用する方法、Carthageを利用する方法があります。ご利用の開発環境に合わせてご利用ください。
CocoaPodsを利用する場合
CocoaPodsのインストール
CocoaPodsがインストールされていない場合は、次のコマンドを実行してCocoaPodsを開発環境にインストールします。
$ sudo gem install cocoapods
RichFlyer SDKを組み込むアプリプロジェクトのルートディレクトリへ移動します。
Podfileの作成
初めてCocoaPodsでライブラリを導入する場合は、以下のコマンドを実行します。 成功するとPodfileが作成されます。 ※同じプロジェクトにCocoaPodsで他のライブラリを組み込んでいる場合はすでにPodfileが作成されています。
$ pod init
Podfileの編集
アプリの実装言語に合わせてPodsファイルに以下を追記します。
ターゲットについて
targetに記述する値は、開発するアプリの設定に従って記述してください。
他のライブラリとの共存について
Podfileに他のライブラリを記載する場合は、そのライブラリを提供しているリポジトリURLをsourceに記載してください。
# Uncomment the next line to define a global platform for your project
platform :ios, '12.0'

source 'https://github.com/INFOCITY/richflyer-specs.git'
source 'https://github.com/CocoaPods/Specs.git'

target 'RichFlyerApp' do
    # Uncomment the next line if you're using Swift or would like to use dynamic frameworks
    # use_frameworks!

    # Pods for RichFlyerApp
    pod 'SwiftRichFlyer', '3.7.0'

    target 'NotificationContent' do
        inherit! :search_paths
    end

    target 'NotificationService' do
        inherit! :search_paths
    end

end
# Uncomment the next line to define a global platform for your project
platform :ios, '12.0'

source 'https://github.com/INFOCITY/richflyer-specs.git'
source 'https://github.com/CocoaPods/Specs.git'

target 'RichFlyerApp' do
    # Uncomment the next line if you're using Swift or would like to use dynamic frameworks
    # use_frameworks!

    # Pods for RichFlyerApp
    pod 'ObjectiveRichFlyer', '1.6.0'

    target 'NotificationContent' do
        inherit! :search_paths
    end

    target 'NotificationService' do
        inherit! :search_paths
    end
end
SDKの取得
以下のコマンドを実行してSDKを取得します。正常に完了すると同じディレクトリに .xcworkspace が作成されます。
$ pod install
プロジェクトの起動
.xcworkspace をダブルクリックしてXcodeを起動します。
注意
.xcodeprojを起動した場合は、CocoaPodsによって取り込んだSDKは適用されません。
SDKのアップデート
SDKがアップデートされた場合、以下のコマンドを実行します。
$ pod update
ライブラリの取得に失敗する場合、Podfileを以下のように修正してお試してください。
pod 'SwiftRichFlyer', :source => 'https://github.com/INFOCITY/richflyer-specs.git'
Carthageを利用する場合
Carthageのインストール
ver12以降のXcodeを利用する場合
ver12以降のXcodeでCarthageを利用する場合、XCFrameworkを使用しない場合にビルド時にエラーが発生する可能性があります。
XCFrameworkをご利用をお勧めします。
また、Carthageのver0.37.0未満はXCFrameworkに未対応です。最新版をご利用ください。
CarthageのModule Stability対応について
Carthageのver0.34.0以下はModule Stabilityに未対応です。最新版をご利用ください。
Carthageがインストールされていない場合は、次のコマンドを実行してCarthageを開発環境にインストールします。
$ brew update
$ brew install carthage
RishFlyer SDKを組み込むアプリプロジェクトのルートディレクトリへ移動します。
Carthageファイルの作成
.xcodeprojファイルと同じディレクトリにCartfileファイルを作成し、アプリの実装言語に合わせて以下を追記します。 すでに同ファイルが存在する場合は、既存のファイルに追記します。
Cartfileファイルに以下を追記します。
github "INFOCITY/richflyer-sdk-swift" ~> 3.0
github "INFOCITY/richflyer-sdk-objc" ~> 1.0
SDKの取得
以下のコマンドを実行して、SDKを取得します。
$ carthage update --use-xcframeworks
$ carthage update
プロジェクトにSDKを追加(XCFramework利用)
ダウンロードされた.xcframeworkをプロジェクトに追加します。
アプリの本体プロジェクト、Notification Service Extension、Notification Content Extensionのそれぞれに追加します。
(プロジェクトのルートディレクトリ)/Carthage/Build以下に.xcframeworkがダウンロードされます。
-
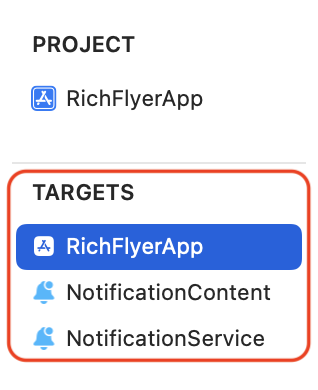
プロジェクトの設定画面を開き、TARGETSから追加したいターゲットを選択します。
アプリ本体プロジェクトのほか、Notification Service Extension・Notification Content Extensionも同様の方法で追加します。
-
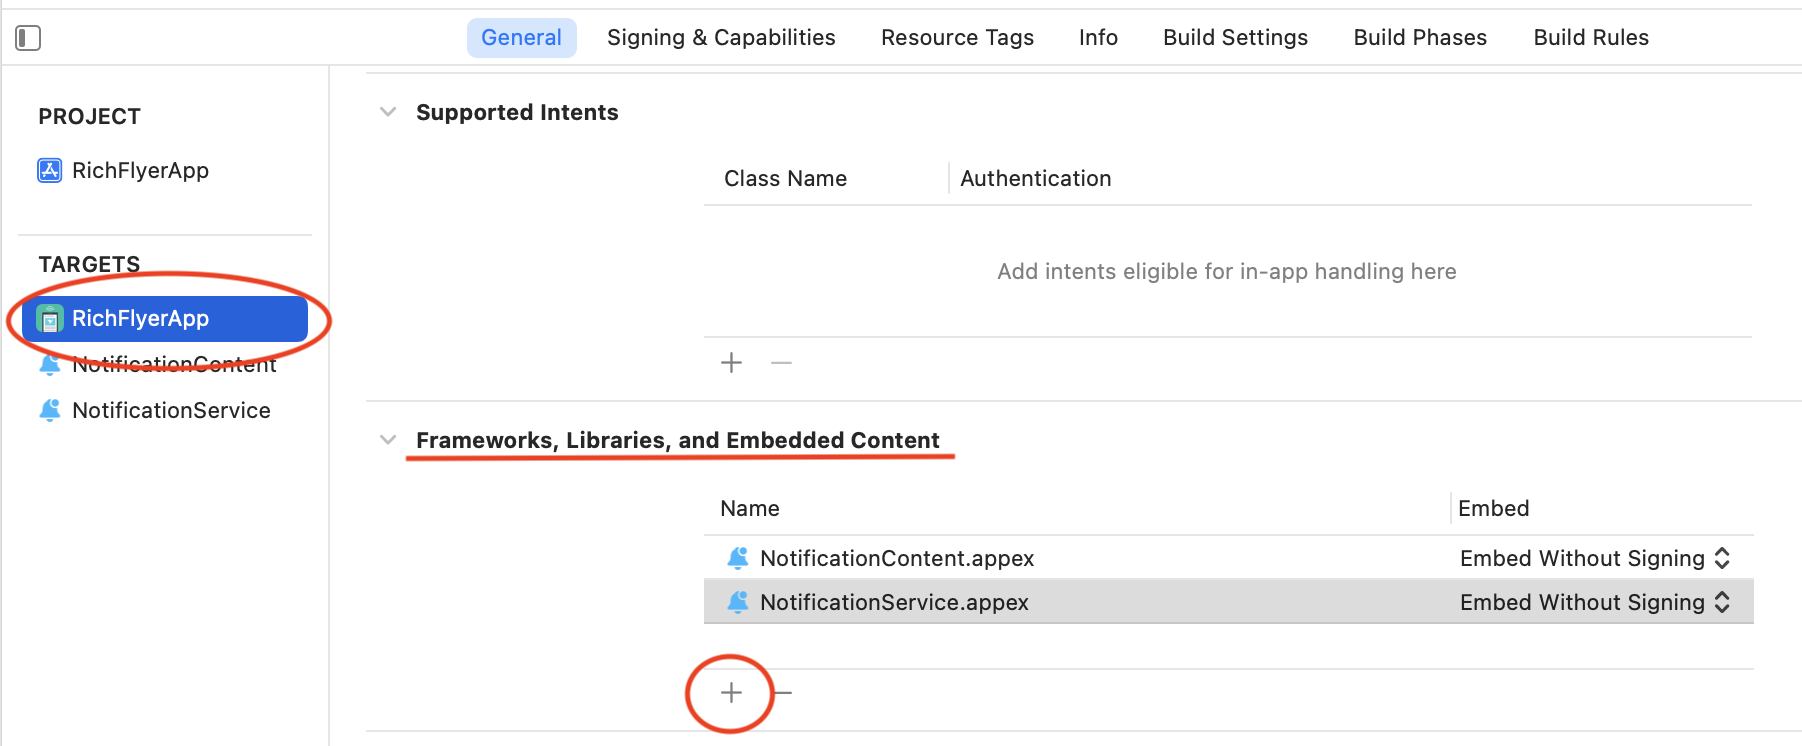
プロジェクトの設定画面を開き、「Frameworks, Libraries, and Embedded Content」- +ボタン選択します。
-
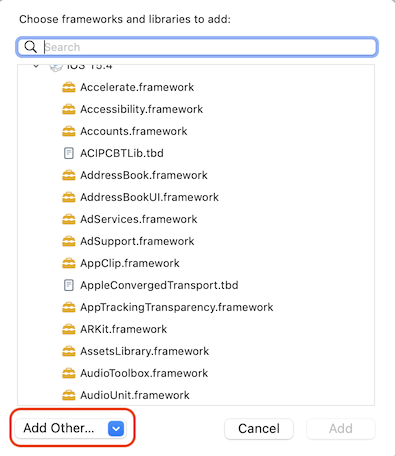
Framework選択画面で「Add Other...」 > 「Add Files...」を選択します
-
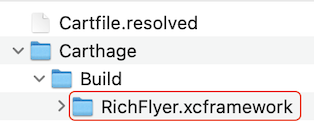
(プロジェクトのルートディレクトリ)/Carthage/Build/以下にある"RichFlyer.xcframework"を選択します。
-
Embed属性を変更します。
※この設定をしないとビルドでエラーになったり、申請時のアプリバリデーションでエラーになります。
- アプリ本体の場合
Embed属性を "Embed & Sign" とします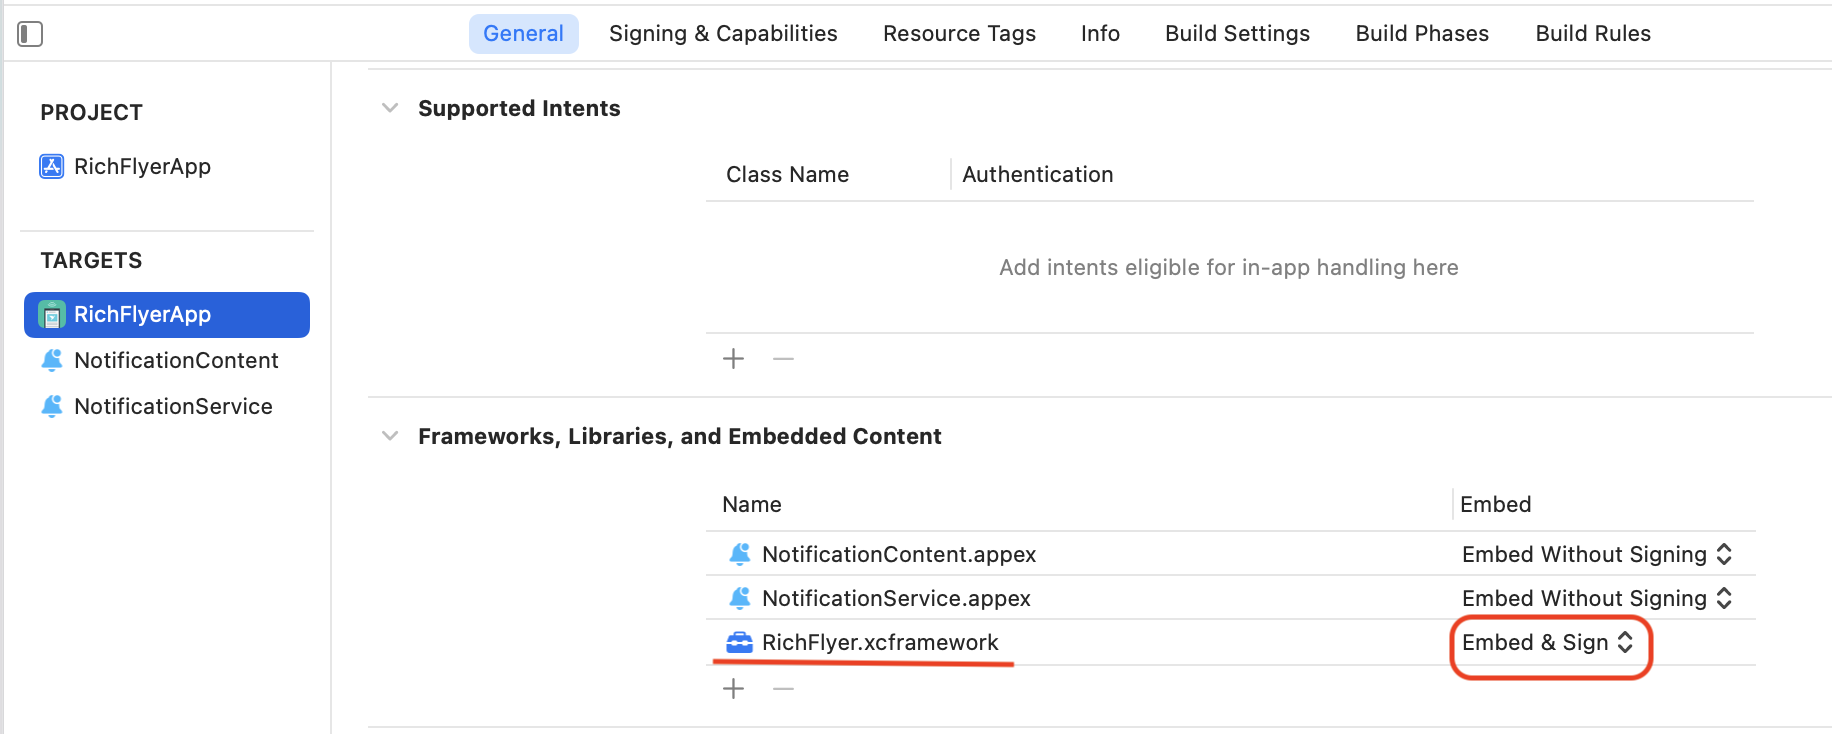
- Notification Service Extensionの場合
Embed属性を "Do Not Embed" とします
- Notification Content Extensionの場合
Embed属性を "Do Not Embed" とします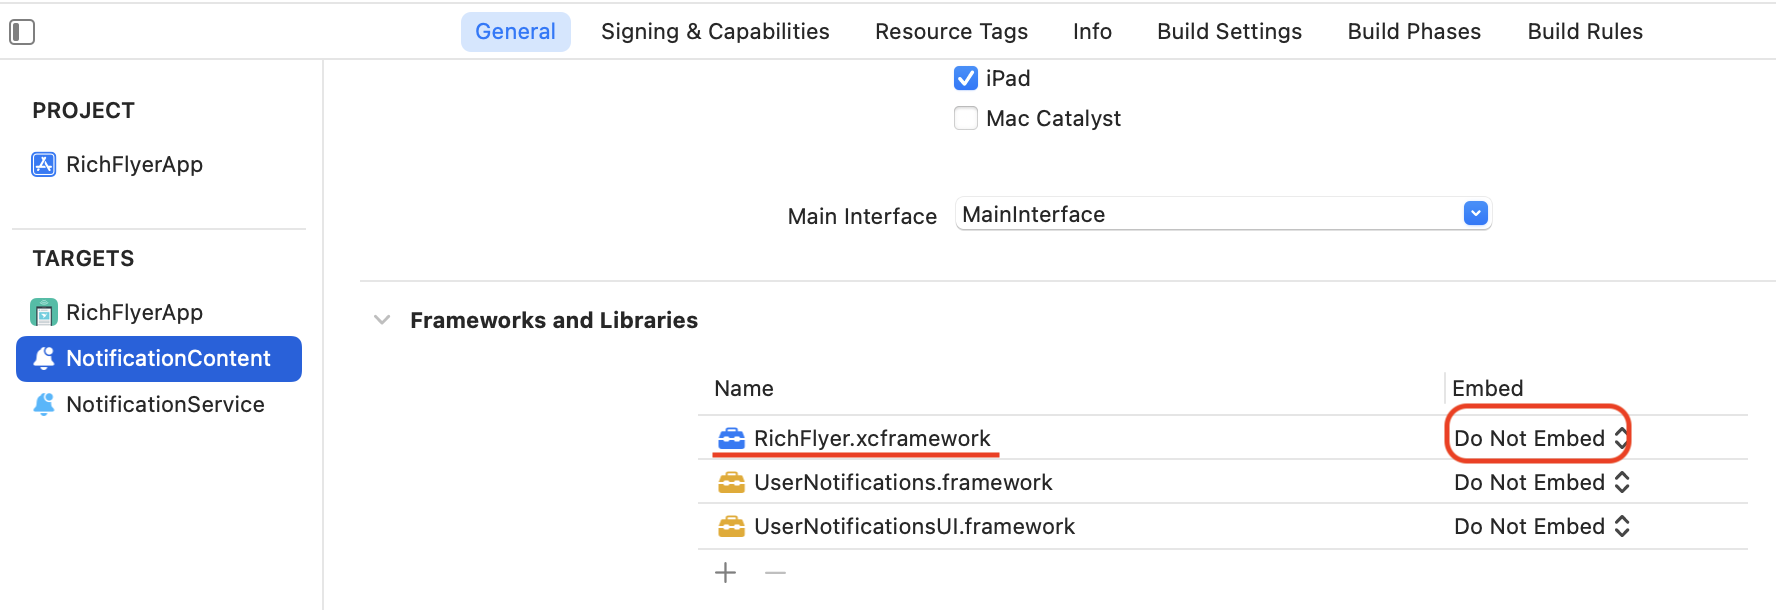
- アプリ本体の場合
プロジェクトにSDKを追加(旧Framework利用)
ダウンロードされた.frameworkをプロジェクトに追加します。
アプリの本体プロジェクト、Notification Service Extension、Notification Content Extensionのそれぞれに追加します。
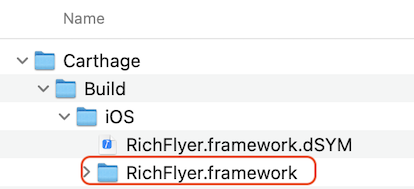
(プロジェクトのルートディレクトリ)/Carthage/Build/iOS以下に.frameworkがダウンロードされます。
-
プロジェクトの設定画面を開き、TARGETSから追加したいターゲットを選択します。
アプリ本体プロジェクトのほか、Notification Service Extension・Notification Content Extensionも同様の方法で追加します。
-
プロジェクトの設定画面を開き、「Frameworks, Libraries, and Embedded Content」- +ボタン選択します。
-
Framework選択画面で「Add Other...」 > 「Add Files...」を選択します
-
(プロジェクトのルートディレクトリ)/Carthage/Build/iOS以下にある"RichFlyer.framework"を選択します。
-
Embed属性を変更します。
※この設定をしないとビルドでエラーになったり、申請時のアプリバリデーションでエラーになります。
- アプリ本体の場合
Embed属性を "Do Not Embed" とします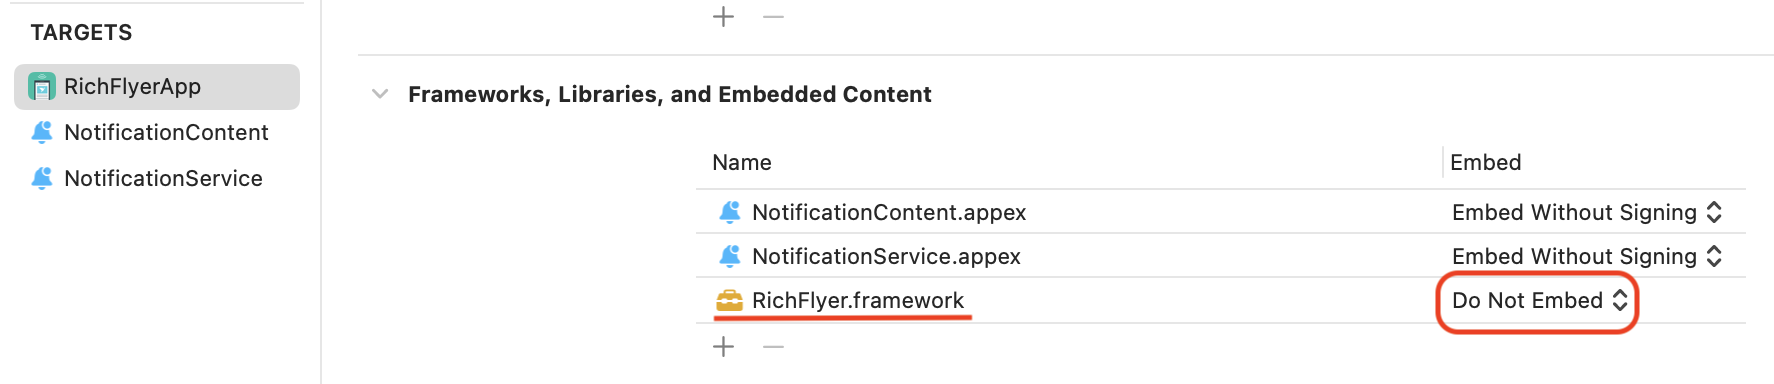
- Notification Service Extensionの場合
Embed属性を "Do Not Embed" とします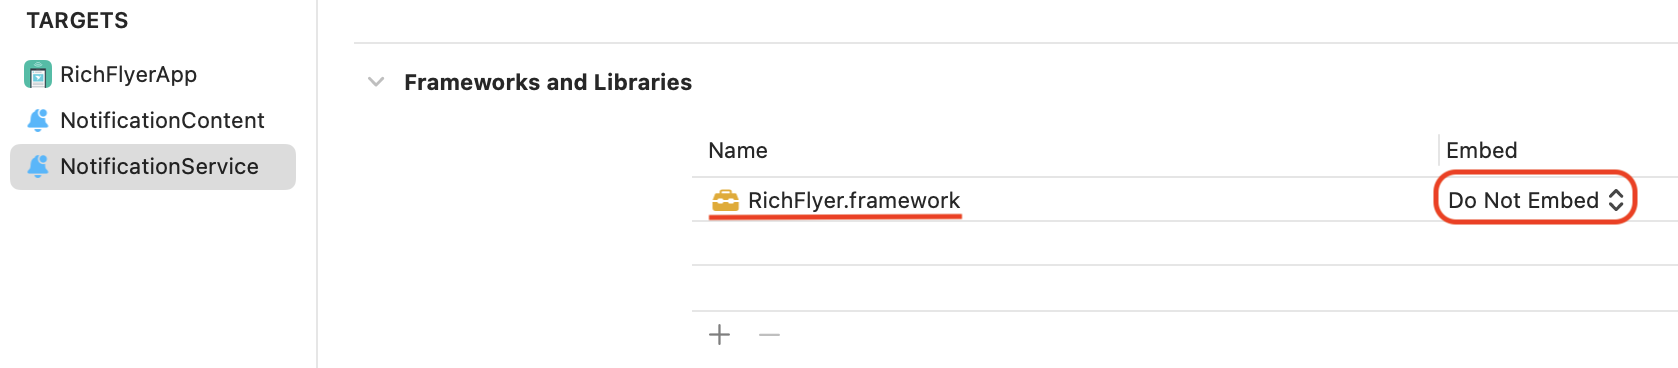
- Notification Content Extensionの場合
Embed属性を "Do Not Embed" とします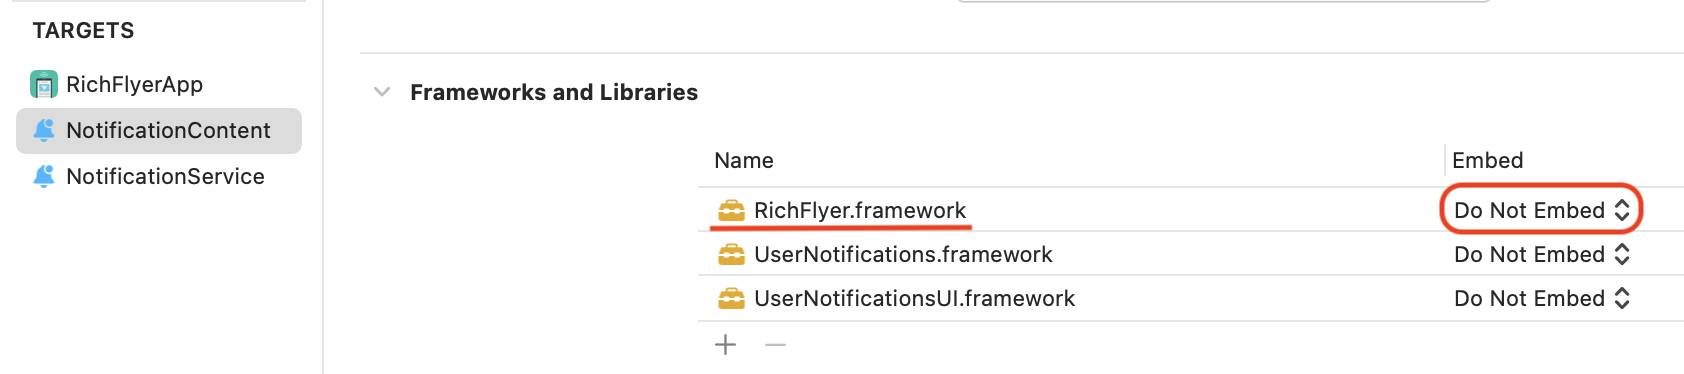
- アプリ本体の場合
スクリプトの追加(旧Frameworkを利用する場合のみ)
注意
旧Frameworkを利用する場合にこの処理を行わないと、アプリをApp Store Connectへ申請する際にエラーが発生する可能性があります。 XCFrameworkを利用する場合は必要ありません。
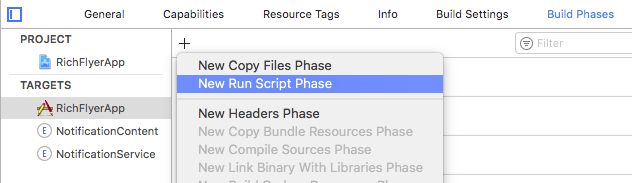
-
プロジェクト設定-「Build Phrase」- +ボタン - 「New Run Script」を選択します。
-
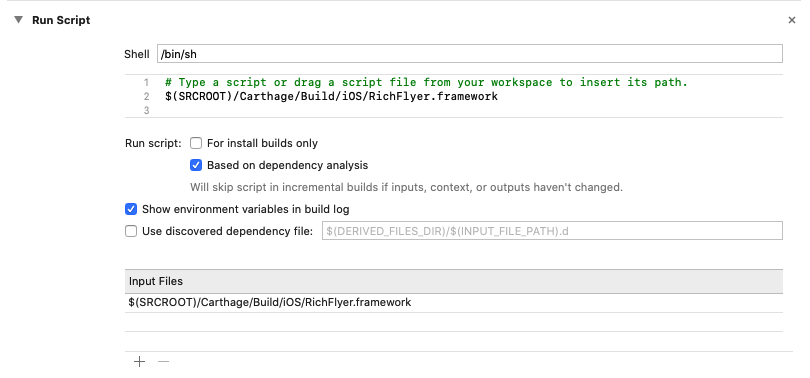
入力欄に以下のスクリプトを記述します。
/usr/local/bin/carthage copy-frameworks -
Input Filesの+ボタンを押し、追加したframeworkへの絶対パスを記述します。
$(SRCROOT)/Carthage/Build/iOS/RichFlyer.framework注意
相対パスで記述するとビルドが正しく完了しない場合があります。
-
Output Filesの+ボタンを押し、追加したframeworkのビルド時の出力先のパスを記述します。
$(BUILT_PRODUCTS_DIR)/$(FRAMEWORKS_FOLDER_PATH)/RichFlyer.framework
手動で追加する場合
Githubから直接frameworkをダウンロードしてXcodeプロジェクトに追加する場合は、必要に応じてアーキテクチャを削除してください。
注意
シミュレーター向けのframework(x86_64、i386)が含まれている場合、IPAファイルの作成時やアプリ申請時のValidateでエラーが発生します。
※XCFrameworkを使用する場合、エラーは発生しません。
i386向けのframeworkを削除する場合
$ cd RichFlyer.framework
$ lipo RichFlyer -remove i386 -output RichFlyer
x86_64向けのframeworkを削除する場合
$ cd RichFlyer.framework
$ lipo RichFlyer -remove x86_64 -output RichFlyer
Bitcodeの除去について
アプリのビルド設定でBitcodeが無効になっている場合、RichFlyer SDKに含まれているBitcodeを削除する必要があります。
Bitcodeの確認の仕方
Xcodeで「Build Settings」-「Build Options」-「Enable Bitcode」が"No"の場合、Bitcodeは無効になっています。

Bitcodeを除去する場合は、以下のコマンドを実行します。
# RichFlyer.frameworkがあるディレクトリへ移動しておく

xcrun bitcode_strip -r RichFlyer -o RichFlyer